The Overlooked Emergency Shelter That Can Buy You Time Outdoors
A simple heavy duty trash bag can work as a fast emergency bivy when weather turns bad. Learn when to use it, how to set it up safely, and which backup shelters make more sense in rain, wind, snow, or roadside emergencies.

A survival shelter method you may not know is not a secret cabin trick or a complicated bushcraft build. In many real emergencies, the most useful shelter is the one you can make fast, with little energy, from something cheap and common. One of the best examples is the heavy duty garbage bag bivy, a simple improvised shelter that can cut wind, shed rain, and help slow dangerous heat loss while you wait for daylight, rescue, or a safer move.
This article focuses on practical shelter choices for ordinary people, day hikers, drivers, campers, and homeowners who want realistic skills. It is general preparedness guidance only, not medical advice or a substitute for hands on wilderness training. If someone has confusion, slurred speech, uncontrollable shivering, unusual drowsiness, signs of heat illness, or an injury that limits movement, contact emergency services as soon as possible.
Why shelter often matters before food
In short term survival situations, exposure is often the problem that gets dangerous first. Wind strips warmth by convection. Cold ground pulls heat away by conduction. Rain and sweat make insulation less effective. Direct sun can push body temperature up and worsen dehydration. That is why a quick shelter, even a rough one, often matters more than thinking about food.
The goal is not comfort. The goal is to reduce heat loss or heat gain, stay as dry as possible, and avoid spending so much effort building that you end up colder, weaker, or harder to find.
The underused shelter method, a heavy duty garbage bag bivy
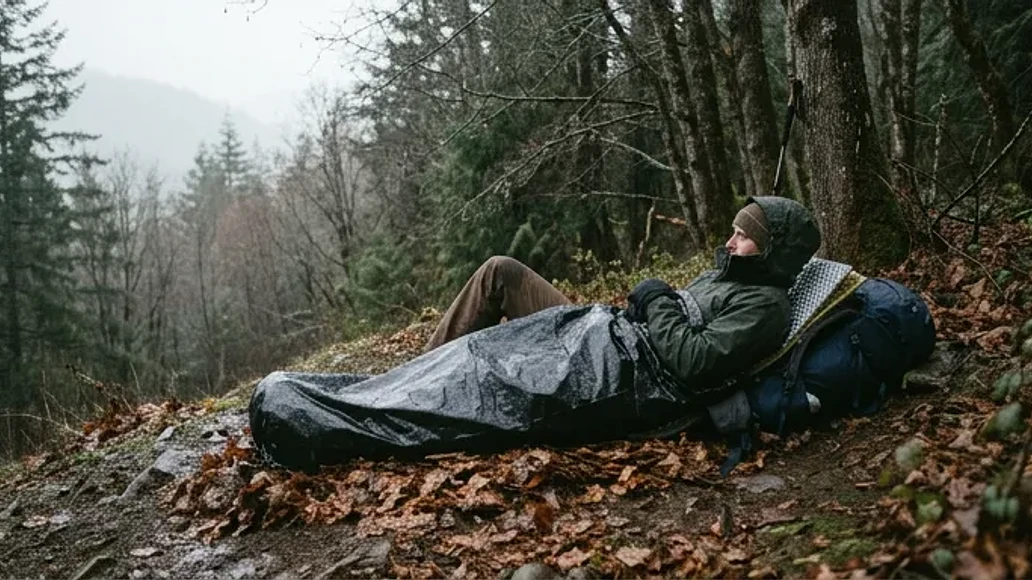
If you carry a contractor bag or even find a large heavy trash bag in a vehicle kit, you already have the makings of a useful emergency shelter. Used correctly, it can function as a bivy sack, rain shell, wind barrier, ground moisture blocker, pack cover, or improvised vapor barrier in cold and wet conditions.
Why it works so well:
- It goes up in minutes.
- It requires very little skill.
- It reduces wind and rain exposure immediately.
- It weighs very little and costs very little.
- It is often better for a short emergency than trying to build a full debris hut from scratch.
It is not magic, and it is not enough by itself in every condition. You still need insulation from the ground, dry layers if possible, and good judgment about where to stop and shelter.
How to turn a trash bag into a fast emergency bivy
This method is best for an unexpected night out, a cold rain event, a roadside delay, or a situation where you are tired, mildly injured, or losing daylight. Choose the simplest version you can manage.
Step 1, pick a safer spot
Before you touch the bag, improve your location if you can do so safely. Look for a place that is out of the wind, above standing water, and away from obvious hazards. Avoid dry creek beds, avalanche terrain, unstable dead branches, cliff edges, and low spots that collect cold air or runoff.
Step 2, insulate from the ground
The ground can chill you fast. Put down pine boughs, leaves, dry grass, a foam pad, spare clothing, a backpack, floor mats from a vehicle, or even flattened cardboard if that is what you have. A perfect windproof shell still fails if you lie directly on cold wet ground.
Step 3, modify the bag carefully
Use a large heavy duty bag. Step into it feet first like a sack. If needed, make a small opening near the side of the face area for breathing and visibility rather than a large hole in the top. Keep the opening modest so you do not lose too much protection. Do not seal yourself inside airtight plastic.
Step 4, keep your core covered
Pull the bag up over your body so your torso and legs are protected. If you have a hat, hood, or jacket collar, use that to protect your head while leaving enough airflow to breathe safely. In rain, angle your body so water sheds away from the opening.
Step 5, add outer protection if available
If you also have a tarp, poncho, blanket, or natural windbreak, use it over or around the bag to reduce exposure further. The bag is your fast inner shell. Extra layers improve performance.
Step 6, stay dry and avoid sweating
Do not overwork yourself gathering huge amounts of debris if you are already chilled. Wet clothing and sweat can undo the benefit of the shelter. Make small improvements first, then reassess.
When this bag shelter is a smart choice, and when it is not
| Shelter type | Build time | Skill level | Best conditions | Main pros | Main cons |
|---|---|---|---|---|---|
| Heavy duty garbage bag bivy | Very fast | Low | Cold rain, wind, unexpected delay, limited energy | Cheap, light, fast, good wind and rain barrier | Limited insulation, condensation, not durable for long stays |
| Tarp A-frame | Fast | Low to moderate | Rain, moderate wind, camp or trail use | Good coverage, reusable, better ventilation | Needs anchors and cordage, less useful without setup points |
| Vehicle shelter | Immediate | Very low | Roadside storms, winter travel, urban emergencies | Best protection for least effort in many situations | Depends on location, fuel, and vehicle condition |
| Debris hut or natural feature shelter | Slow | Moderate to high | Longer stays, wooded terrain, no carried gear | Can be warm if built well | Time and energy intensive, easy to build poorly |
| Snow trench | Moderate | Moderate | Snow country, wind exposure, winter emergencies | Good wind protection, uses available material | Cold work, collapse risk, poor choice in avalanche terrain |
In many short term emergencies, the bag bivy is the right answer because it is the fastest answer. It is a poor choice if you have a safe building or vehicle available, if temperatures are extreme and you lack insulation, or if the plastic would create dangerous overheating in hot weather.
Other practical shelter methods people often overlook
Snow trench
In winter terrain with deep stable snow, a trench can provide much better wind protection than sitting exposed. Dig just large enough for your body, not a roomy cave. Add insulation under you, and keep ventilation in mind. Avoid avalanche paths, cornices, and tree wells that could collapse or trap you.
Raised platform plus tarp
When the ground is saturated, the problem is often below you as much as above you. A simple raised bed of poles, brush, or any dry barrier under a tarp can outperform a more elaborate shelter built directly on mud. This is especially useful in wet forests and after heavy rain.
Natural feature plus debris
A fallen log, rock overhang, root mass, or dense evergreen edge can reduce the amount of construction needed. Use natural cover as a starting point, then add a small windbreak or roof layer. Keep expectations realistic. Natural shelters save effort only if they are already in a safe location.
Simple urban improvised shelter
In a city or roadside emergency, the best shelter may be a parking garage corner out of the wind, a public building, a transit station, or staying with your vehicle. Improvised urban shelter should prioritize visibility, exits, and legal access. Avoid confined spaces with poor ventilation or limited escape routes.
A 10 minute decision guide for choosing the right shelter
When conditions are turning bad, use this order of thinking:
- Can I safely use a vehicle, building, or other existing structure?
- If not, what is the fastest shelter I can make with what I already have?
- What is the biggest immediate threat, rain, wind, cold ground, sun, or blowing snow?
- How much daylight and energy do I have left?
- Will moving farther make rescue harder or put me in worse terrain?
If you are exhausted, injured, with children, or caring for an older adult, choose the lowest effort shelter that gives meaningful protection. That usually means vehicle first, then tarp or bag shelter, then more labor intensive builds only if truly necessary.
Staying with your car or using a building is often the best survival move
Preparedness culture sometimes overvalues wilderness construction and undervalues the obvious. If your car is operable enough to provide shelter and you are not in immediate danger from fire, flood, unstable ice, or traffic, staying with it is often safer than heading off to build something in the dark. A vehicle gives wind protection, visibility to rescuers, and a place to organize layers and supplies.
The same logic applies to sheds, ranger stations, public buildings, and other legitimate structures you can access safely. In many emergencies, the smartest shelter is the one already built.
How to build a basic tarp shelter with minimal skill
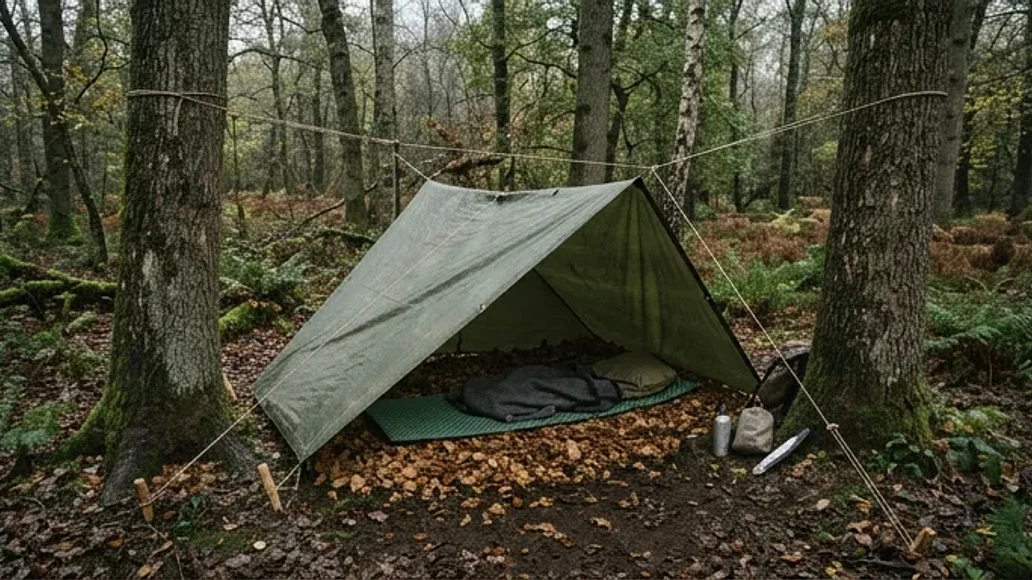
If you carry a tarp and cord, an A-frame or lean-to gives more comfort and flexibility than a bag bivy. Keep it small. A shelter that is too large traps less warmth and catches more wind.
Fast A-frame
- Run a ridgeline between two trees or anchors.
- Drape the tarp over the line evenly.
- Stake or tie down both sides close to the ground on the windward side.
- Leave a lower opening on the leeward side for entry and ventilation.
- Add ground insulation inside.
Fast lean-to
- Anchor one long edge of the tarp higher up.
- Stake the opposite edge low to the ground.
- Face the closed side into the wind.
- Use brush, packs, or logs to block side drafts.
The minimum viable version is simply one edge tied low and the other edge weighted or staked, enough to block rain and wind while you sit or curl up on insulation.
Common mistakes that make improvised shelters fail
| Mistake | Risk | Safer alternative |
|---|---|---|
| Building too large | More heat loss, more wind exposure, more work | Make the shelter only as large as needed to fit your body |
| Ignoring ground insulation | Rapid conductive heat loss | Use leaves, pads, packs, brush, cardboard, or spare clothing under you |
| Choosing a low wet site | Flooding, cold pooling, soaked insulation | Pick slightly elevated ground with drainage and wind protection |
| Working until you sweat heavily | Clothing gets wet, then chills you when you stop | Build the fastest useful shelter first, then improve it gradually |
| Using open flame too close to plastic, tarp, or snow shelter | Burns, smoke inhalation, carbon monoxide, melting leaks | Keep fire at a safe distance and never use flame inside enclosed spaces without proper ventilation |
| Sealing plastic too tightly | Breathing hazard, condensation buildup | Maintain a modest breathing opening and monitor comfort |
Adjusting your shelter for rain, cold, wind, and heat
| Weather scenario | Recommended shelter approach | Key adjustments | Main risks |
|---|---|---|---|
| Cold rain | Bag bivy or low tarp with strong ground insulation | Prioritize dryness, block wind, protect head and torso | Hypothermia from wet clothing and wind |
| Dry cold | Small tarp, snow trench, or natural windbreak with insulation | Reduce internal volume, add thick ground barrier | Heat loss to ground and night air |
| High wind | Vehicle, low tarp, snow trench, or terrain wind shadow | Keep profile low, anchor well, avoid ridgelines | Wind chill, shelter failure, flying debris |
| Hot sun | Shade shelter with airflow | Ventilate, avoid plastic wrap effect, reduce exertion | Heat exhaustion, heat stroke, dehydration |
In heat, think shade first, not insulation. A contractor bag that helps in cold rain can become a liability in direct sun. In hot weather, use tarps, reflective shade, buildings, or vehicles with ventilation if safe to do so.
Who should be extra cautious
Children, older adults, pregnant people, and those with heart disease, diabetes, respiratory illness, limited mobility, or low body mass can get into trouble faster in both cold and heat. They may also tolerate exertion poorly. For these groups, conservative decisions matter more than clever shelter building. Stay with the vehicle when possible, call for help early, and choose the least strenuous option.
Micro shelter kits for your car, day pack, and home
| Item | Approximate cost | Weight or space | Primary use | Backup uses |
|---|---|---|---|---|
| Heavy duty contractor bag | Low | Very compact | Emergency bivy, rain barrier | Poncho, pack cover, gear liner, water resistant ground sheet |
| Small tarp | Low to moderate | Compact | Roof, windbreak, shade | Ground cloth, gear cover, signaling panel |
| Paracord or utility cord | Low | Compact | Tarp setup, repairs | Guy lines, splint tie, gear lashing |
| Foam sit pad or closed cell pad section | Low | Bulky but light | Ground insulation | Kneeling pad, seat, pack frame support |
| Emergency blanket or bivy | Low | Very compact | Heat reflection, wind barrier | Signal aid, extra layer over bag shelter |
| Warm hat and dry socks | Low | Compact | Warmth management | Sleep layer, backup clothing |
| Headlamp | Low to moderate | Compact | Night setup and signaling | Hands free camp task light |
A car kit can be larger and include blankets, gloves, water, and a full size tarp. A day pack kit should focus on compact items that solve exposure fast.
Practicing safely before you need the skill
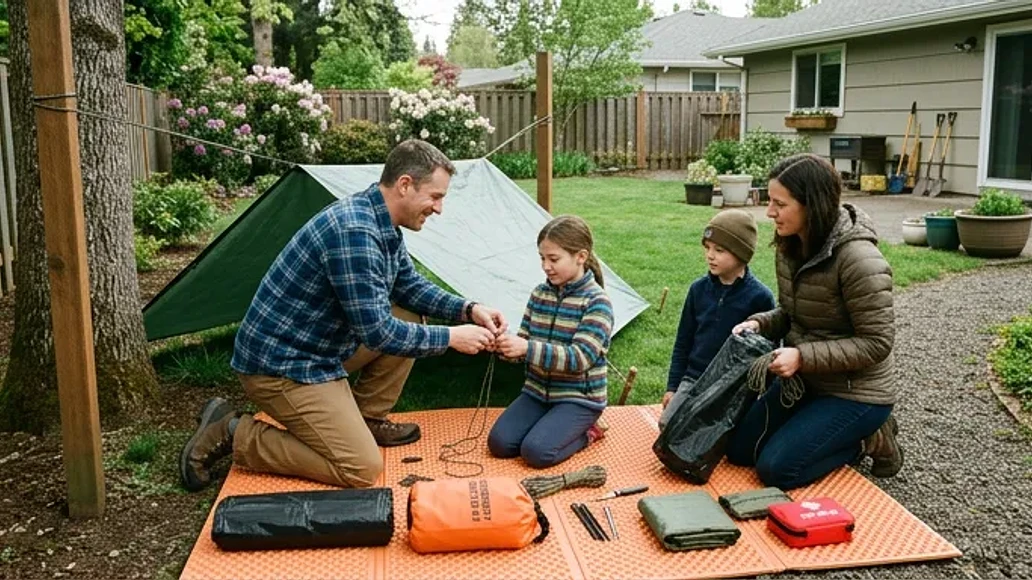
The best time to learn this is not during a storm. Practice in your yard, at a campground, or in a legal day use area close to help. Try setting up a contractor bag bivy, then a low tarp A-frame, and time yourself. Notice how much insulation you need under your body. Practice with gloves on and in fading light.
Do not cut live vegetation in public lands unless rules allow it. Do not build fires in risky conditions. Keep practice sessions short and controlled.
Myths about unusual survival shelters
The internet loves the idea of hidden knowledge, but most real survival outcomes improve because of simple decisions made early. A fast shelter, dry layers, staying found, and not exhausting yourself usually matter more than mastering a complicated primitive structure. The best underknown method is often not exotic at all. It is the humble, low cost item you actually carried and knew how to use.
When building a shelter is the wrong move
Do not default to construction if a better option exists. Building a shelter may be the wrong move when:
- You have a safe vehicle or building available.
- Someone is injured or showing signs of hypothermia or heat illness.
- Darkness, terrain, or weather makes gathering materials dangerous.
- You are in flood zones, avalanche terrain, wildfire areas, or under unstable trees.
- Moving around will make you harder for rescuers to locate.
Sometimes the right plan is to improve your current shelter slightly, signal, conserve energy, and wait.
Quick action checklists
If you are suddenly stuck outside in bad weather
- Stop and assess immediate hazards.
- Use vehicle or building shelter if safely available.
- Get out of wind and off wet ground.
- Put on dry or warmer layers.
- Set up the fastest useful shelter, bag, tarp, or natural windbreak.
- Signal early and stay easy to find.
- Monitor for confusion, worsening shivering, weakness, or overheating.
If you are packing a low cost shelter kit
- Add at least one heavy duty contractor bag.
- Add a compact tarp and cord.
- Add insulation for sitting or lying on the ground.
- Add light, warm headwear, and dry socks.
- Store one kit in your car and one in your day pack.
- Practice setup before you need it.
FAQ
Is a trash bag really enough to keep you alive in bad weather?
Sometimes, yes, for a short emergency. It can make a meaningful difference by blocking wind and rain, especially when paired with ground insulation and warm clothing. It is not a substitute for a sleeping bag, tent, or proper winter shelter in severe conditions.
How long can you safely stay in an improvised survival shelter?
There is no fixed safe time. It depends on temperature, wind, moisture, your clothing, your health, and how well the shelter was built. Think of improvised shelters as tools to buy time, not permanent solutions.
Should you build a shelter or stay with your car if you break down in a storm?
In many cases, staying with the car is safer if the location itself is not immediately dangerous. The vehicle is easier for rescuers to spot and usually offers better protection with less energy spent.
What is the easiest survival shelter for someone with limited strength or mobility?
A vehicle or building is best. If that is not available, a heavy duty bag bivy or a very low tarp setup is usually the least demanding option. Keep the shelter small and focus on insulation underneath the person.
Do you need a fire if you already have a good shelter and warm clothing?
Not always. Fire can help, but it also adds burn, smoke, and carbon monoxide risks, especially near plastic, tarps, or enclosed spaces. A good shelter, dry layers, food if available, and insulation may be enough to get through a short emergency more safely.