Build a Safer Canning Pantry, The Prepper Supply List That Actually Matters
A practical, safety-first guide to the canning gear, jars, lids, tools, and pantry consumables worth buying for long-term preparedness, with clear rules on water-bath versus pressure canning and what you should never improvise.

If you are building food security at home, canning can be a useful skill, but only when the supplies match the food and the method. For preppers, the word essential should mean more than convenient. It should mean gear that helps prevent broken jars, failed seals, burns, spoilage, and the far more serious risk of foodborne illness.
This guide focuses on the canning supplies that matter most for a dependable pantry. It also draws a hard line between tools that are optional and tools that are non-negotiable for safety. This article is for educational purposes only and is not a substitute for official food preservation guidance, professional food-safety advice, or medical advice. When in doubt, follow current USDA, National Center for Home Food Preservation, and extension service recommendations.
What essential really means in a prepper canning setup
A prepper-minded canning kit should do three things well. First, it should let you process food using a tested method. Second, it should reduce the chance of injury when handling boiling water, steam, and hot glass. Third, it should be maintainable over time, with replacement lids, spare parts, and a workflow you can repeat during harvest season or when stocking up on sale items.
The biggest mistake is treating canning like a gadget hobby. Safe canning does not require a giant bundle of specialty tools, but it does require the right canner, proper jars, new lids, and tested recipes. Those are the real essentials.
Water-bath or pressure canner, your first and most important decision
Before buying anything else, decide what foods you plan to preserve. This determines the canner you need.
High-acid foods, such as many jams, jellies, fruit preserves, pickles, and properly acidified tomatoes, are generally processed in a boiling-water canner or a deep stockpot with a rack. Low-acid foods, such as meats, broths, beans, and most vegetables, require a pressure canner. Not a pressure cooker. Not a multi-cooker. A true pressure canner designed and approved for home canning.
This distinction is not a matter of preference. It is a safety rule. Water-bath canning cannot reach the temperatures required to safely process low-acid foods. Processing them longer in boiling water does not make the method safe.
| Food type | Required canner | Essential tools | Common mistakes |
|---|---|---|---|
| Jams, jellies, most fruit preserves | Boiling-water canner or deep stockpot with rack | Rack, canning jars, new lids, bands, jar lifter, funnel, tested recipe | Using random jars, skipping headspace guidance, changing sugar or acid without a tested recipe |
| Pickles and relishes made with tested acid levels | Boiling-water canner or deep stockpot with rack | 5 percent vinegar, proper jars, new lids, jar lifter, nonreactive prep tools, tested recipe | Using homemade vinegar of unknown acidity, reducing vinegar, guessing processing time |
| Tomatoes that require added acid in tested recipes | Usually boiling-water canner, sometimes pressure canner if recipe allows | Bottled lemon juice or citric acid when called for, jars, lids, rack, tested recipe | Skipping added acid, substituting fresh lemon juice, using untested times |
| Plain vegetables, beans, soups, broths, meats | Pressure canner | Pressure canner, rack, jars, new lids, jar lifter, tested recipe, altitude adjustment guidance | Using a pressure cooker, water-bath processing, ignoring venting and pressure instructions |
The bare-minimum safe canning kit for beginners
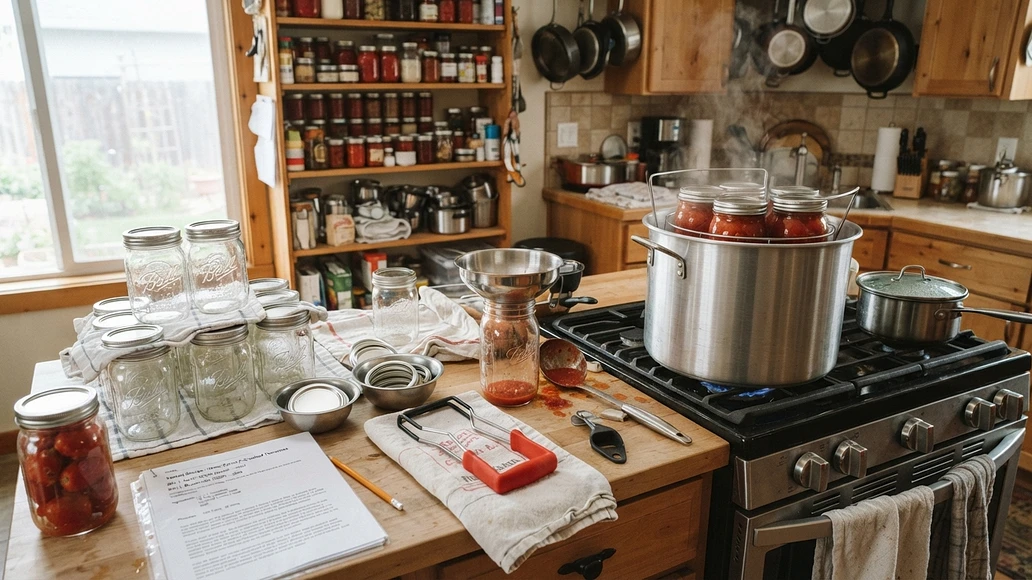
If you are just starting, you do not need every accessory on the shelf. You do need a basic kit that supports safe processing and safe handling.
| Item | Must-have or optional | Why it matters | Safe improvisations |
|---|---|---|---|
| Boiling-water canner or deep stockpot with rack | Must-have for high-acid foods | Provides enough depth and steady boiling while keeping jars off the pot bottom | A deep stockpot can work if it fully covers jars with water and includes a rack |
| Pressure canner | Must-have for low-acid foods | Reaches temperatures required for safe processing | None |
| Canning jars | Must-have | Made to withstand repeated home-canning heat cycles | None for processing |
| New flat lids | Must-have | Reliable seal for each batch | None |
| Bands in good condition | Must-have | Hold lids in place during processing | Reuse only if not rusted, bent, or damaged |
| Jar lifter | Must-have | Helps prevent burns and dropped jars | None that is equally safe |
| Wide-mouth funnel | Must-have | Reduces spills and keeps jar rims clean | A clean food-safe funnel if it fits properly |
| Bubble remover and headspace tool | Helpful, near-essential | Supports accurate fill level and removes trapped air | A clean chopstick and a ruler can work if used carefully |
| Clean towels and cloths | Must-have | For wiping rims, drying jars, and keeping the workspace controlled | Any clean lint-free towels |
| Tested recipe source | Must-have | Provides safe acid levels, headspace, processing time, and altitude guidance | None, this is a core safety supply |
| Magnetic lid lifter | Optional | Convenience only | Tongs are not a direct substitute if they damage lids |
| Decorative labels or label printer | Optional | Organization and appearance | Marker and masking tape |
For many households, this starter kit is enough to begin with jams, pickles, and fruit. If your preparedness plan includes shelf-stable vegetables, stock, chili base, or meat, add a pressure canner before you add more gadgets.
Building a prepper-grade pressure canning setup
Pressure canning is where many preparedness plans become more useful, because it opens the door to low-acid foods that are harder to store long term without electricity. It is also where mistakes become more serious.
Choose a pressure canner, not a pressure cooker
A pressure cooker is not automatically a safe substitute for a pressure canner. Many electric multi-cookers and small pressure cookers are not approved for home canning low-acid foods. Recent discussions in the canning world continue to stress this point. Core guidance has not changed, but there is strong emphasis on avoiding multi-cookers for pressure canning and on keeping gauges accurate.
Size and stove compatibility matter
Look for a canner large enough to hold at least four quart jars if you plan to can larger batches or preserve broth, beans, and meat. Check whether your stove can safely support the canner when full. Some glass-top and induction ranges have manufacturer limits on weight or canner type. Verify before buying.
Gauge type and maintenance
Pressure canners may use a dial gauge, a weighted gauge, or both depending on model. Dial gauges should be checked for accuracy on a regular schedule, often annually through local extension services. Gaskets, overpressure plugs, and racks should be inspected and replaced when worn. For long-term preparedness, spare parts are worth stocking if your model uses them.
| Pressure canner feature | Why it matters | Prepper buying note |
|---|---|---|
| Approved pressure canner design | Needed to safely process low-acid foods | Do not assume a cooker or multi-cooker is equivalent |
| Rack included | Keeps jars off the bottom and supports even heating | Buy an extra rack if your model supports double stacking with tested guidance |
| Dial or weighted gauge system | Controls processing pressure | Dial gauges need accuracy checks, weighted systems reduce calibration concerns |
| Replacement gasket and plug availability | Older canners may be unusable without parts | Favor models with easy-to-find parts |
| Stove compatibility | Safety and performance issue | Confirm with both stove and canner manufacturer guidance |
Core tools that prevent mistakes and injuries
Some tools are not glamorous, but they reduce the most common problems on canning day. A jar lifter helps you move hot jars without squeezing them awkwardly. A proper rack keeps jars from direct contact with the pot bottom, which lowers breakage risk. A funnel keeps food off the rim, which improves sealing. A bubble remover and headspace measure help you fill jars correctly, which matters for seal quality and processing performance.
Heat-resistant gloves can be useful around steam and hot lids, but they do not replace a jar lifter. Cooling racks or thick towels on a draft-free counter help jars cool more evenly after processing. Keep children and pets away from the work zone, and avoid crowded counters where handles can be bumped.
Canning consumables worth stocking in a prepper pantry
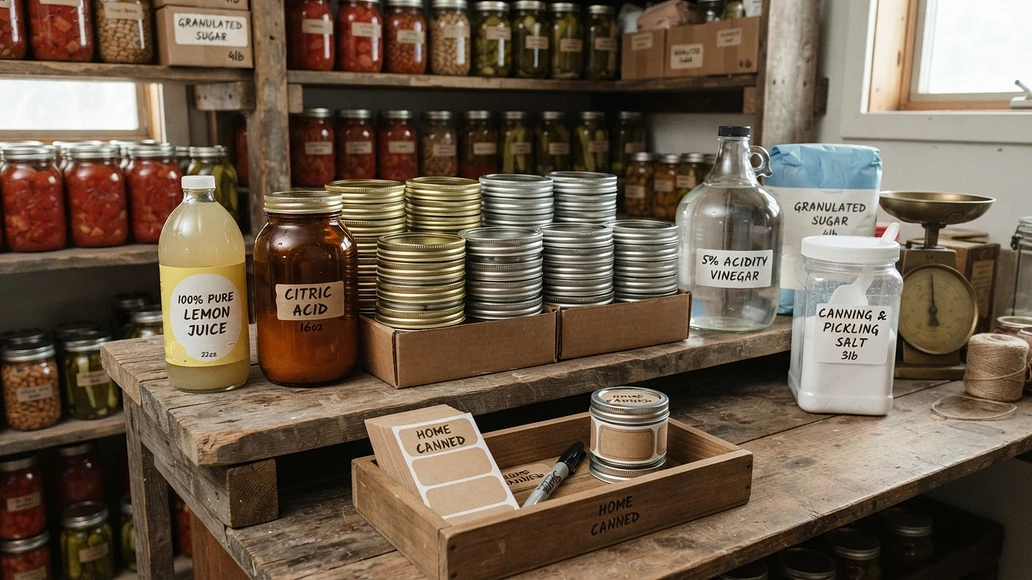
Preparedness is not just about durable gear. It is also about having the small consumable items that recipes depend on. These are easy to overlook until you are in the middle of harvest season.
| Consumable | Main use | Why preppers stock it | Important caution |
|---|---|---|---|
| New flat lids | Sealing jars | Single-use item that can disappear from shelves during peak season | Use new lids for each batch |
| Canning salt | Pickles and some preserved foods | No anti-caking additives, useful for clear brines | Follow tested recipe amounts |
| 5 percent vinegar | Pickling and acidified recipes | Core ingredient for many shelf-stable pickles | Do not use vinegar of unknown acidity |
| Bottled lemon juice | Acidification, especially tomatoes | Reliable acidity compared with fresh lemons | Use when the recipe specifically calls for it |
| Citric acid | Acidification and some fruit recipes | Compact, shelf-stable, useful backup to bottled lemon juice | Measure exactly as directed |
| Ascorbic acid | Helps reduce browning in some fruits | Useful for appearance and quality | Quality aid, not a substitute for safe processing |
| Sugar | Jams, preserves, syrups | Needed for many tested recipes | Do not reduce or swap amounts unless the recipe allows it |
| Labels and permanent marker | Dating and identification | Critical for rotation and pantry control | Label contents and date every batch |
What you can improvise, and what you should never substitute
Preparedness often rewards improvisation, but home canning has strict limits. Some substitutions are reasonable. Others are red flags.
| Shortcut or substitution | Safe or unsafe | Risk level | Recommended alternative |
|---|---|---|---|
| Deep stockpot with a proper rack instead of a dedicated boiling-water canner | Safe for high-acid foods | Low if pot is deep enough and maintains a full boil | Use a pot that covers jars with water as directed by the recipe |
| Clean chopstick for bubble removal | Usually safe | Low | Use a nonmetal bubble remover to avoid jar damage |
| Ruler for headspace measurement | Safe | Low | Use a dedicated headspace tool if preferred |
| Commercial food jars from store-bought products for home processing | Unsafe | High | Use jars designed for home canning |
| Reusing old flat lids for another canning batch | Unsafe | High | Use new flat lids every time |
| Skipping the rack so jars sit on the pot bottom | Unsafe | Medium to high | Use the correct rack for the pot or canner |
| Using a pressure cooker or multi-cooker for low-acid canning | Unsafe | High | Use an approved pressure canner |
| Changing acid, starch, vegetables, or meat amounts in a recipe without tested guidance | Unsafe | High | Use a tested recipe from USDA, NCHFP, or extension sources |
How much a safe canning setup costs
You can start modestly if you focus on high-acid foods first. Costs rise when you add a pressure canner, but that is the correct place to spend money if your pantry plan includes low-acid staples.
| Item | Budget option, approx cost | Mid-range option, approx cost | Notes on safety |
|---|---|---|---|
| Deep stockpot or boiling-water canner with rack | $30 to $60 | $60 to $120 | Depth and a proper rack matter more than appearance |
| Pressure canner | $120 to $180 | $180 to $350 | Buy approved equipment, not a generic pressure cooker |
| Case of canning jars | $15 to $25 | $20 to $35 | Inspect for chips and cracks before use |
| Box of new lids | $3 to $8 | $5 to $10 | Stock extras before peak season shortages |
| Jar lifter and funnel | $10 to $20 | $20 to $35 | These are high-value safety tools |
| Bubble remover and headspace tool | $3 to $8 | $8 to $15 | Can be improvised carefully if needed |
| Consumables, vinegar, lemon juice, salt, labels | $15 to $40 | $30 to $60 | Recipe-dependent, easy to underestimate |
| Reference book or printed tested guides | $0 to $20 | $20 to $40 | One of the best safety investments you can make |
If money is tight, prioritize in this order: tested recipes, proper jars, new lids, a jar lifter, a rack-equipped boiling-water setup for high-acid foods, then a pressure canner when you are ready for low-acid foods.
Setting up your canning workspace for smoother batch days
A safe canning day is easier when the workspace is planned. Keep your prep area, filling area, canner, and cooling area in a logical flow. Put towels, funnel, bubble remover, and lids within easy reach. Leave enough room near the stove to move jars without twisting around obstacles.
Use stable counters and avoid placing hot jars in cold drafts. Keep floors dry to reduce slips. If you are pressure canning, make sure the area is well ventilated and that you can monitor the canner without distractions. Batch days are not ideal times for multitasking with unrelated chores.
Maintaining equipment for long-term preparedness
Preparedness gear should be inspected before it fails. Check jars for nicks on the rim, hairline cracks, and chips. Discard damaged jars from canning use. Bands can be reused if they are not bent, rusted, or warped. Wash and dry them thoroughly before storage.
For pressure canners, inspect the gasket, vent pipe, safety plug, handles, and rack. If your canner uses a dial gauge, have it checked on the schedule recommended by the manufacturer or your local extension office. Store the canner clean and dry, and avoid clamping the lid down tightly during storage if the manufacturer advises against it.
Keeping a small parts kit can be smart for preparedness. A spare gasket, extra overpressure plug, and an extra rack can save a season if local stores are out of stock.
Labeling, storage, and rotation for a prepper pantry
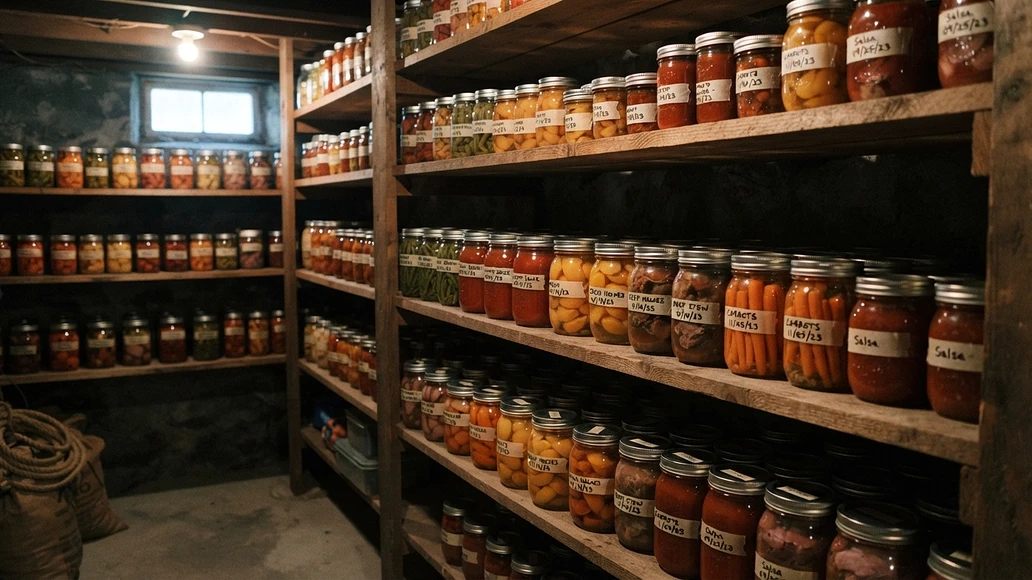
Once jars are sealed, the preparedness job is only half done. Label every jar with the contents and date. If you make multiple versions of the same food, add the recipe source or batch note. Store jars in a cool, dark, dry place away from direct sunlight and temperature swings.
For quality, many home canning authorities recommend using home-canned foods within about a year, even if seals remain intact longer. Rotation matters. Put newer jars behind older ones and check shelves regularly for broken seals, leakage, cloudiness not expected by the recipe, or other signs of spoilage.
Common canning supply mistakes preppers make
One common mistake is buying lots of accessories before learning the method. Another is trying to save money by reusing commercial jars or old flat lids. Those shortcuts can lead to broken jars or failed seals. A more serious mistake is assuming a pressure cooker can stand in for a pressure canner, or that low-acid foods can be made safe by boiling them longer.
Altitude is another overlooked factor. Processing times and pressures may need adjustment depending on where you live. That is one more reason tested recipes and current official guidance belong on the essential-supplies list.
| Topic or claim | Evidence strength | Notes |
|---|---|---|
| Basic equipment list, canner or pot, rack, jars, new lids, bands, jar lifter, funnel, bubble remover, towels, tested recipes | Well supported | Consistent across USDA-aligned beginner guidance |
| Water-bath canning is only safe for high-acid foods | Well supported | Core canning safety principle |
| Pressure canning is mandatory for low-acid foods | Well supported | Critical for botulism prevention |
| Commercial jars should not be used for home processing | Well supported | They may not tolerate repeated canning conditions |
| New flat lids should be used for each batch | Well supported | Bands may be reused if undamaged |
| Large bundled kits are often unnecessary | General guidance | Start with core tools, add convenience items later |
When home canning is not the best preparedness tool
Home canning is useful, but it is not always the best answer. It takes time, fuel, jars, and storage space. Jars are breakable, and home-canned foods are usually best rotated on a shorter timeline than some commercial canned goods. For certain foods, dehydration, freezing, freeze-drying, or buying commercially canned staples may be simpler or safer.
If your goal is deep pantry resilience, think in layers. Home canning can be one layer, especially for garden produce and some pressure-canned staples. It does not need to be the only one.
Trusted recipe and safety resources to keep on hand
For canning, a tested recipe is as important as a jar or lid. Use current guidance from the USDA Complete Guide to Home Canning, the National Center for Home Food Preservation, and university extension services. These sources explain processing times, headspace, acidification, altitude adjustments, and equipment care.
If you are unsure whether a recipe is tested, or whether your canner is functioning correctly, contact your county or state extension office before processing the batch.
Health considerations and when to ask an expert
People who are pregnant, immunocompromised, elderly, or very young are more vulnerable to foodborne illness. Be especially cautious with home-canned foods for these groups, and avoid serving anything made from untested recipes or questionable supplies.
Never taste food from a jar that shows signs of spoilage, leakage, a broken seal, unusual odor, or spurting liquid. If anyone develops neurologic, gastrointestinal, or systemic symptoms after eating home-canned food, seek prompt medical evaluation.
FAQ
Can I start canning as a prepper with just a big pot and some jars?
Yes, but only for high-acid foods, and only if the pot is deep enough, uses a rack, and you follow a tested recipe. You still need proper canning jars, new lids, bands, and a jar lifter.
Do I really need a pressure canner, or can I water-bath everything longer?
If you want to can low-acid foods like meat, beans, broth, or most vegetables, you need a pressure canner. Boiling longer does not make water-bath canning safe for those foods.
Is it safe to reuse commercial jars and old lids for home canning?
No for processing. Commercial jars are not the same as home-canning jars, and old flat lids may fail to seal. Use jars designed for home canning and new flat lids for every batch.
Which canning supplies should I prioritize first on a tight budget?
Start with tested recipes, proper jars, new lids, a jar lifter, a funnel, and a rack-equipped boiling-water setup for high-acid foods. Add a pressure canner when you are ready to preserve low-acid foods.
How long do home-canned foods last in a prepper pantry if I use the right supplies?
Safe storage depends on proper processing, a good seal, and cool, dark storage. For best quality, many authorities recommend using home-canned foods within about one year and rotating regularly.